Create a stunning events calendar
Wow your customers with a beautiful embeddable calendar that can be customised to complement your branding.
23rd Jan 2018 | Alex K
So you have been given the job of promoting your company's events. You have already got together the marketing material - photographs, lists of speakers, snappy content, etc.
You now just need to inform your customers about the events. There are many ways you can approach this. You could publish adverts in the local press, post customers an events brochure or simply email them. These are all brilliant ways of getting news of your events out. But they rely on you already having customers' contact details.
Ultimately, if you want as many people as possible to find out about your events, you are going to have to publish something online. This is where an online events calendar can prove valuable. Online events calendars are web apps where you can enter your events and have them displayed in an interactive calendar.
The calendar will automatically display upcoming events to your customers so you don't continually need to edit a web page. They can save you a lot of time. However, many online calendars are - to be frank - a bit ugly. Their designs do not do justice to the slick marketing material that you have produced to promote your events.
And even the web calendars that boast decent designs often lack visual customization options, so you are forced to stick with their design even if it does not complement your company's branding at all.
Don't fear, however. There is one online events calendar that has been designed from the ground up to allow you to customize its appearance. Here, we will explain how you create a beautiful online events calendar using ChronoFlo Calendar, the new service from web app maker Webalon.
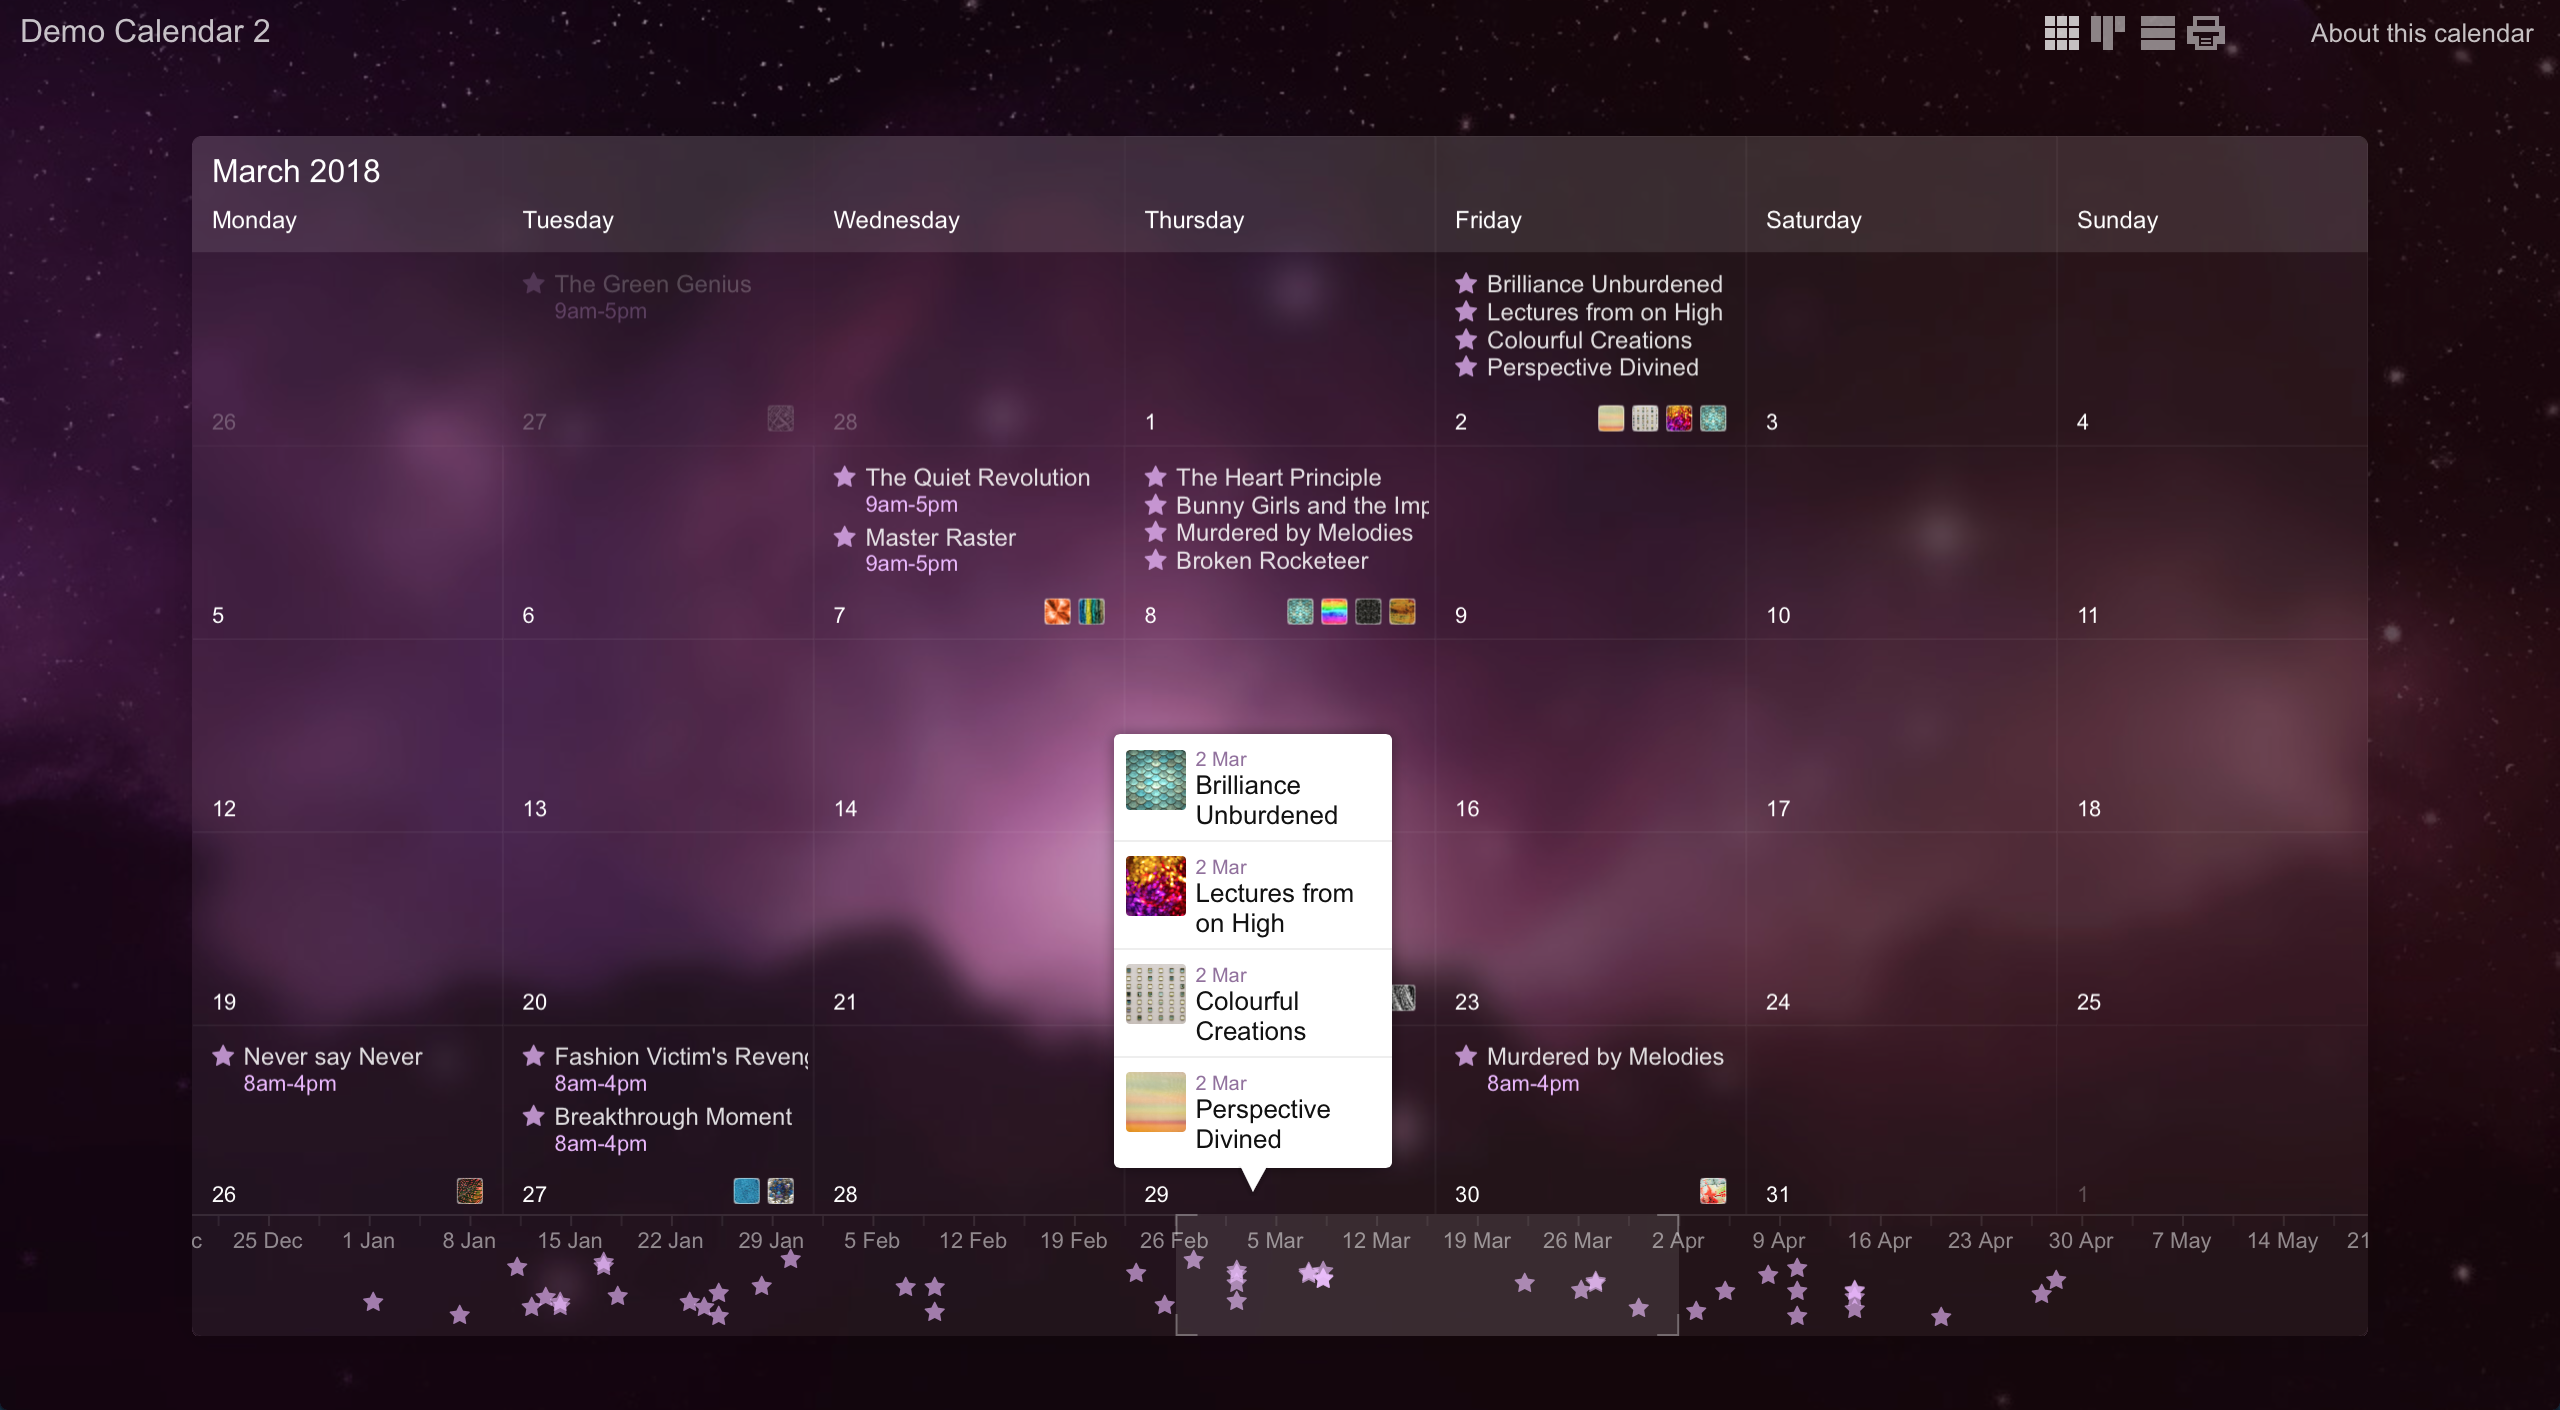
Before we start, we recommend that you take a look at some sample web calendars created using ChronoFlo Calendar. See here, here, here and here.
Pretty, eh. And did you notice the integrated timeline at the bottom of the calendars that makes it dead easy to naviagte to future and past months in the calendar. No other calendar service offers such a feature.
Assuming you like what you saw, let's get started.
1 Create a ChronoFlo Calendar account
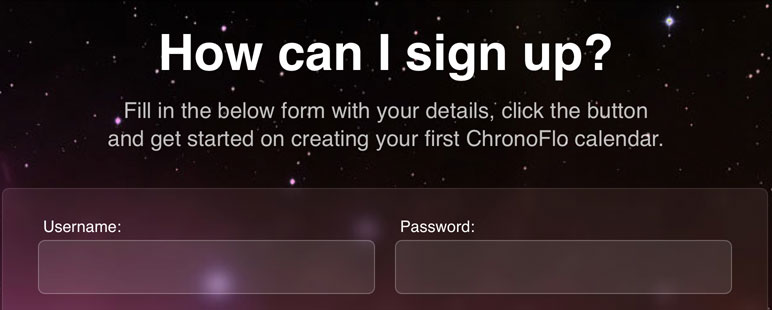
ChronoFlo Calendar has a free account that allows you to create a fully-functional calendar. We will be using this for this tutorial. To create a free account, go to ChronoFlo Calendar's home page, click on the 'Sign up' button and then fill in your details.
2 Create your first calendar
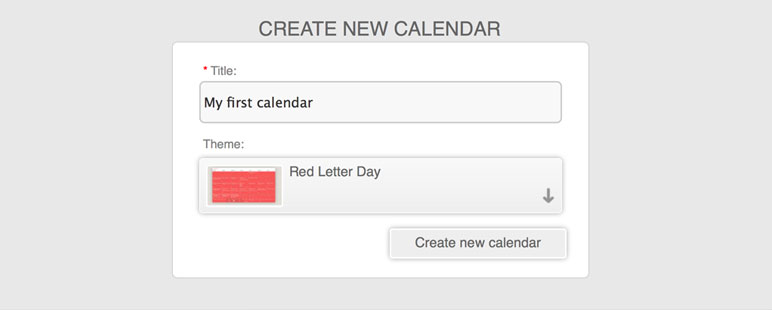
Once you have created your account, you will be taken to your account page. Here, you will find a list of any calendars you have created and a form for creating a new calendar. Enter the name of your calendar in the form, choose one of the themes (doesn't matter which one) and click the 'Create new calendar' button. And, voila, behold your fancy new interactive calendar.
Take note of the options panel on the right of the screen. This is where you can add events and change your calendar's settings. To see your new calendar in its full glory, you can minimise the options panel by clicking on the cross at the top right corner.
3 Customise the look of your calendar
The first thing you will probably want to do is change the appearance of your calendar. ChronoFlo Calendar makes this dead easy. It comes with a handful of hand-designed themes that you can switch between via a dropdown menu in the 'Appearance' tab in the options panel. Firstly, select the Appearance tab by clicking on the 'Change the appearnance of your calendar' button. Then choose one of the themes from the 'Theme' dropdown menu.
If none of the themes are quite what you are looking for, you can create your own theme by clicking on the 'Create theme' option and then selecting a predesigned theme to base your new theme on. Choose the theme that looks most similar to what you are seeking for your events calendar.
4 Add events to your calendar
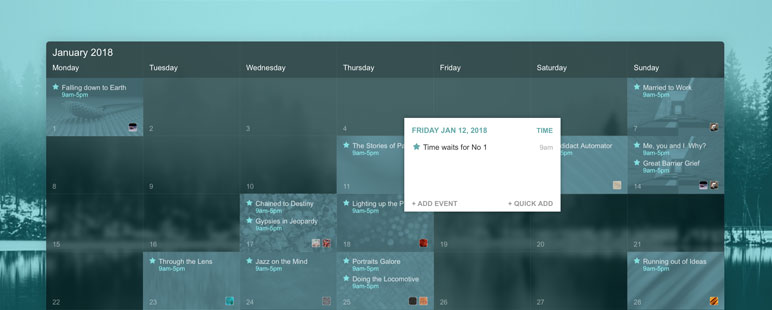
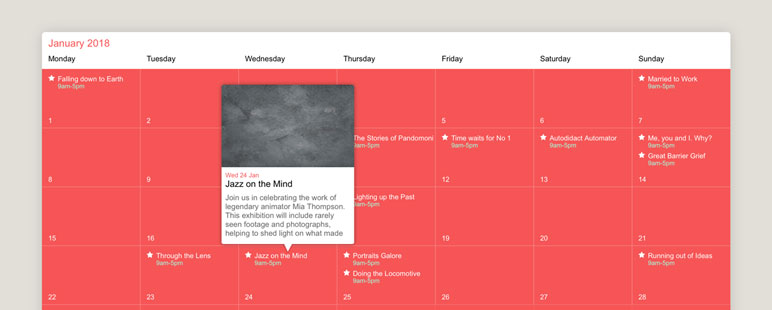
Now you have your calendar looking just as you want, you will probably want to add some events. There are a couple of ways you can do this. Hover over a day block on your calendar, and a panel will popup giving you the option to add an event. Click on this to open the event creation panel where you can enter information about your event and media to accompany it.
The other way to add an event is via the Events management panel. You can open this by clicking in the 'Create or edit an event' button in the Options panel. The Events management panel displays a list of events that you have already created, giving you the option to edit them. It also allows you to create a new event by clicking on the 'Create new event' option at the bottom left - click on this and you are once again taken to the event creation panel.
5 Share your calendar with the world
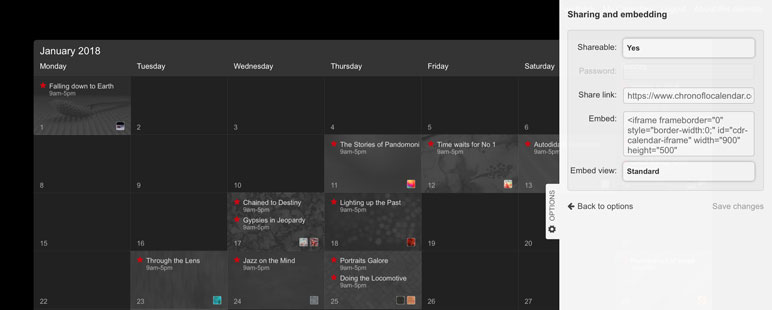
There is not much point creating an events calendar if you can't share it with anyone. Thankfully, ChronoFlo Calendar makes this easy. It provides you with a sharable url for your calendar that you can email to people on publish on the web. You can find this url in the 'Sharing and embedding' tab in the options panel. Click on the 'Share or embed your calendar' option to reach this tab. Then copy the url in the 'Share link' field.
6 Optionally, upgrade your account to embed the calendar on your website
Sharing a calendar is completely free with ChronoFlo Calendar. However, if you want to embed your calendar on your website, you will need to upgrade to a premium Bronze or Silver account. Upgrading offers lots of benefits. In addition to the ability embed your calendar, ChronoFlo premium accounts allow you to create multiple calendars, upload images to our servers, create more themes for your calendars etc. For further information on our premium accounts and on how to upgrade, see our FAQs page here.
We hope you enjoyed this tutorial. If you have any questions, please drop us an email at help@chronoflocalendar.com. To keep up to date with the latest ChronoFlo news and developments, you may want to follow us on Twitter, Facebook and Google Plus.